Sample Problems
Easy
Easy
Medium
Medium
Hard
Hard
Extreme
Extreme 1
Extreme 2

Descriptive Color
Scheme
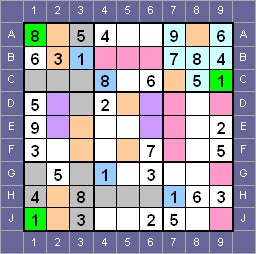
To aid in understanding, the following color scheme
is used in the diagrams:
- A group of interest is shown in pale blue
- Cells of interest are shaded pale yellow
- Completed cells are shaded green
- Excluded cells are shaded gray
- Target number cells are shaded blue
- Pairs are shaded rose
- Triples are shaded rose
- Constraints are shaded blue
- Extreme strategy cells are shaded red
- Exclusion cells are shaded pale orange
Note: pairs may
also be shaded pale orange or yellow to distinguish
from other subsets
Sample
Problems General Information
The approach taken with the step-by-step solutions is to use strategies
that are appropriate to the level of development associated with the
difficulty level of the puzzle. For example, a beginner will likely be
working on easy puzzles and will only be able to apply the Single
Possibility strategy from Chapter 2 and the Row, Column, and Box Check
strategies from Chapter 3. So the easy puzzles are solved only using
those strategies.
The step-by-step solution boards are presented in the actual sequence I
used to solve the puzzles. I can only describe one path to the solution,
and it is not necessarily the fastest or most efficient path. I
sometimes jump between strategies when solving these puzzles. While I
advocate a systematic approach, I also advocate solving cells as soon as
a solution becomes apparent since solving cells often helps solve other
cells. If you try to solve the puzzle yourself and follow a different
path, your solution will be equally valid as long as your logical
process is correct.
The approach I advocate involves selecting a group and working to find
the solution to cells within the group or working to find the location
of a target number in the group. The group selected for analysis is
highlighted. An exception is the Box Exclusion strategy where
highlighting the box is not practical since gray shading is used to
indicate cells that cannot contain the target number in the box. The
shading starts from the target number being used, which is shaded in
blue, and extends to the box being checked.
For row, column, and box check strategies, filled cells that are helpful
in reducing possibilities are highlighted in yellow.
When a solution is found, the cell is shaded green and the solution
number is placed into the cell.
Once a strategy has been applied to solve a cell, other cells may become
immediately solvable using the single possibility strategy and taking
advantage of available clues. Solutions that follow from the clues are
shaded green but the cell solutions are not filled in. This is done to
allow you to better understand how the clues are used to find these
additional solutions.
In the sidebar I describe the primary strategy used for each diagram and
may include hints regarding the position. On diagrams where multiple
solutions can be found, cell solutions are listed in the order that they
occur. The next diagram will contain all the solutions from the previous
diagram. I recommend that you work through these solutions yourself to
see how the clues get used to find solutions.
Other cells of interest are shaded in different colors to indicate cells
that formed a pattern such a naked pairs, triples, quads, or constraints
or cells where the clues were updated.
Medium Puzzles
In solving the medium difficulty puzzles, I use only the strategies
presented in Chapters 2 and 3, plus the Naked Pairs strategy covered in
Chapter 4.
My approach is to use the Box Exclusion strategy first. I find this the
most effective method unless I see rows, columns, or boxes with fewer
than four empty cells. Those may be worth checking right away using the
Row, Column, and Box Check strategies.
When I use Box Exclusion, I try different target numbers. Sometimes I
start with 1 and work my way up to 9, and other times I look at the most
prevalent numbers on the board and try those numbers first. For each
target number, I check all the boxes for potential solutions.
